Tampilkan postingan dengan label Sewing. Tampilkan semua postingan

Senin, 15 Oktober 2012

Skirts!

Okay here’s 2 more projects that I’ve made for Halloween costumes. They’re pretty straightforward, but each one is a little different. Ready? Here’s the one for Thing 2.

Petal Skirt (2)

First off I cut a bunch petal shapes from different colors of fabric, that I was going for in my costume. I cut 2 for each petal.

Petal Skirt (3)

Sewed around the curve, leaving the top open

Petal Skirt (4)

Snipped every 3/4” –ish around the curve to make sure it would lay flat, then turned them right side out.

Petal Skirt (9)

Ironed them flat, and cut an elastic to the waist measurement. Overlapped it about 1” and sewed it together securely. Then, I pinned the petals onto the elastic, making sure they were nice and loose. Meaning the top of the petal was 5”, and I pinned them so they took up about 3 1/2” of space on the band. And I overlapped the petals about 1” so there wouldn’t be a gap.

Petal Skirt (5)

Then, sewed it on the machine.

Petal Skirt (6)

I pulled the elastic tight after sewing 1 end of the petal down, so the elastic would bunch up the petal when it’s relaxed.

Petal Skirt (7)

It was getting very pretty

Petal Skirt (8)

I decided to add a 2nd row of petals, so I hand stitched 6 petals to the inside middle of each of the 6 I just put on.

Petal Skirt (1)

See how you can’t see any gaps?

Petal Skirt (10)

Then, I added some tulle to the inside. I just cut it to the length I wanted, and just gathered it up as I was sewing.

Petal Skirt

Voila! The finished product turned out just how I wanted!

Petal Skirt (12) copy

I’ve had sick girl so she wants to be in pajamas all day long Sad smile

Petal Skirt (11)

Now, for Thing 1’s skirt. This took a bit more brainstorming on my part. She’s being very specific about color. So, I kind of sat there contemplating dyeing something, then realized I had the PERFECT fabric from Miya Design’s sale that I’ve raved about before. It was actually sitting by me on the sewing table because I knew there was a Halloween project waiting for me to discover it. Isn’t it pretty?

Orange Sparkly Skirt (2)

It was the perfect color, and it was sparkly, which can’t miss with my princess. So, I cut it to the length I wanted, and then used part of the pantyhose from here and here to make the waistband.

Orange Sparkly Skirt (4)

I just cut a strip longer than the waist measurement by a few inches, and then sewed it to the sparkly orange fabric, gathering it up as I went. To make things easier, I pinned both pieces to match in 1/8s, meaning I folded it in half and marked it, then quarters, and then 1/8s.

Orange Sparkly Skirt (5)

I just sewed through the waistband folded in half, because I made it big enough for my elastic to go in after.

Orange Sparkly Skirt (6)Orange Sparkly Skirt (7)

Then, I added a bunch of layers of tulle in behind the orange fabric in different lengths. Just because I can. I pinned those all on, and then sewed them on the line I already sewed to attach the waistband.

Orange Sparkly Skirt (8)

I did a layer of red tulle, a layer of orange (that is more bright than I wanted) and 2 layers of black tulle. Nice and poufy Smile

Orange Sparkly Skirt (9)

Next I put my elastic into the waistband casing

Orange Sparkly Skirt (10)Orange Sparkly Skirt (11)

Sewed both ends shut, even with the casing.

Orange Sparkly Skirt (12)

And then I sewed the orange outer layer together with the casing, to finish the skirt. I did as close to the edge as I could.

Orange Sparkly Skirt (1)

And made sure the elastic was nice and secure.

Orange Sparkly Skirt (14)

Finished!! She wanted to wear the gloves, antenna, and wings, but I wouldn’t let her wear the wings yet….

Orange Sparkly Skirt (13) copy

Okay, here’s some other things that caught my eye if these skirts don’t do it for you.
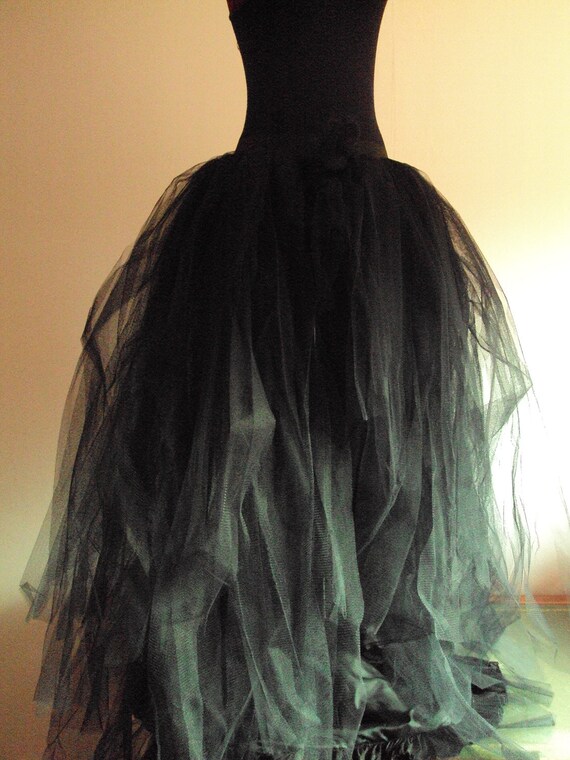
This tulle skirt is awesome. I pretty much love it. Word to the wise, don’t think it’s that easy to dye tulle black. You’re better off buying it black. I speak from experience. This skirt is from Etsy.
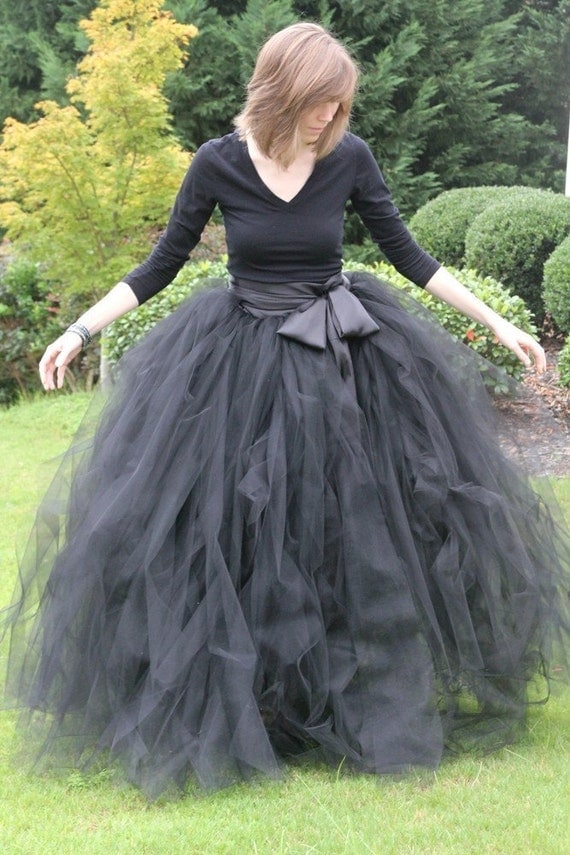
Again, from Etsy and very similar, but still awesome. I guess it’s actually for a Prom or wedding, but I’d totally be a witch in that!

Here’s a round-up of some awesomely unique costumes. Go look at Catching Fireflies.

Welp, that’s all for now folks! If you want help/ideas, please let me know!

Halloween Button copy

READ MORE - Skirts!

Senin, 08 Oktober 2012

_____ Gives you Wings!

This post has to deal with 3 different sets of similar wings, and then I’ll show you other ideas. First, the store-bough fairy wings from when I was in college. Yes, I bought dress up clothes even then. What can you do? The problem is, they wouldn’t fit my baby. The arm loops were too big. So, this is my quick adjustment for that. I sewed the loop so that it was smaller.
Adjusting Wings (1)
Now, there’s 2 different sized loops for if older or younger daughter wants to wear them. And the wings will actually stay by their shoulders instead of down by their butt. Next, is the wings that were inspired by the store-bough wings. I bought some pantyhose and hangers
Making Wings (3)
The observant ones may remember that pantyhose from here.
Making Wings (2)
and bent the wire into shape, and used electrical tape to tape the ends together. (I might have done this while watching the second season of Downton Abbey. I’ll never tell)
Making Wings (4)
Word to the wise, do as I say not as I do, and make sure the tape is down at the points, not on the top edges like me. For me, I dealt with it.
Making Wings (5)
Then I put one loop inside the pantyhose,
Making Wings (9)
and make sure the toe seam is on the edge of the hanger.
Making Wings (8)
Then, you can put the bottom part of the same wing inside the loop, inside edge first, and have both inside the 1 leg.
Making Wings (11)
See? I want the overlap, and I actually moved it to be how I wanted the wing to be shaped.
Making Wings (13)
Pull it nice and tight, making sure it looks how you want it to.
Making Wings (12)
Pin along the open edge, and then sew as close as you can to the hanger. I used a zipper foot. Once you cut it, it’ll squish up against the wire anyway.
Making Wings (10)
Really quick, I’ll show you the 3rd of the wings I’m working on. I made the loops and then bought 2 packs of knee highs from Wal-Mart.
Knee High Wings (2)
And put a loop in each knee high.
Knee High Wings (3)
Pinned the tops, and sew
Knee High Wings (1)
Then cut off the top.
Knee High Wings (4)
Cut as close as you can without cutting your stitching. It should blend in pretty well. Okay, now they’re pretty much the same from now on.
Now, sew the 2 loops together that you’ve overlapped to be one wing. Again, as close as you can without breaking your needle on unforgiving hanger wire.
Making Wings (14)
And, I decided to embellish this one with black felt circles. So I cut out 2 (1 on each side),
Making Wings (21)
and sewed them on the wings, top and bottom, at the same time.
Making Wings (24)
That way, they’re on both sides, and it’s more stable, and more pretty.
Making Wings (6)
It’s a lot of maneuvering trying to get those wires to work with you machine. Not gonna lie.
Making Wings (7)
A lot of going backwards too. and leaving the needle in and rotating.
Then, you measure between the shoulder blades, and around the shoulders themselves. Cut a stable something for the wings to go onto. Like leather.
Making Wings (18)
And then sew on your elastic (enough to go comfortably around the arms at the shoulder) to the back side of your stabilizer.
Making Wings (19)
Overlapping the elastic for stability, and making sure everything is sewn down really well.
Making Wings (20)
Then, I hand sew it onto my wings.
Making Wings (1)
And that’s it! Embellish with glitter, paint, feathers, spots, lines, designs, whatever!
Finished Wings (2) copy
Here’s my ladybug wings finished, (I may do some black glitter around the spots to make them pop more. In fact I think I will) and then up close:
Finished Wings (3)
Here’s the store bough ones to give you some fun ideas to finish them.
Finished Wings (4)
You could hot glue things on to decorate, like the ribbon and feathers, just test it on a scrap. I don’t know if hot glue will melt tights or not. Haven’t tried yet.
Finished Wings (1)
Now, for other ideas in case you don’t want to do tights and hanger wings:

These are really cool wings. A bunch of multi-colored feathers  that go on your actual arm? It’s basically cardboard with Velcro to go around the arm, and then everything is glued on. You could do that same idea if you wanted to make them like mine, and do angel or multi-colored wings. A piece of cardboard cut to shape, and then glue on your feathers. Awesome. It’s over here at Martha Stewart Crafts.

Here’s another take on the wings. You can make them multicolored, or do an ombre or rainbow pattern. So fun! Just a piece of fabric and then scalloped pieces of fabric sewn on. Over here at Natasha Jane’s blog. If you want more detailed instructions with pictures, go here to Plucky Momo.

Lots of glitterSmile Fairy wings tutorial over at Antique lilac. These are gorgeous. I want to make some. Now!

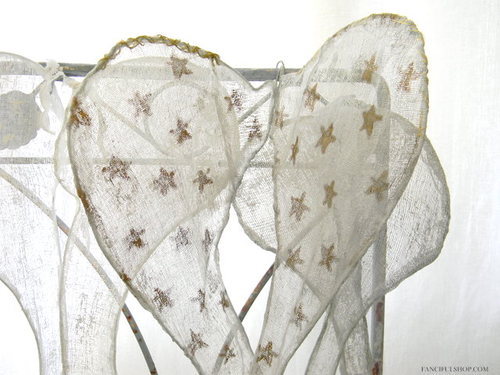
These you could make like I did, and stencil the stars on, or something like that. Pretty, huh? Over here. For even more inspiration, just go do a search on Pinterest or Google for wings, or specifically what you’re looking for (bumblebee, fairy, butterfly, owl, bird, etc.) Good luck!
Halloween Button copy
Hope you’re enjoying this so far! It’s forcing me to get off my duff and get these costumes done!!
READ MORE - _____ Gives you Wings!